Time: Custom Overtime Packages
Table of Contents
- Navigate to Overtime Packages Page
- Creating New Overtime Packages and Overtime Rules
- Editing an Existing Overtime Package
- Scheduling a Change to an Existing Overtime Rule
- Terminating an Existing Overtime Rule
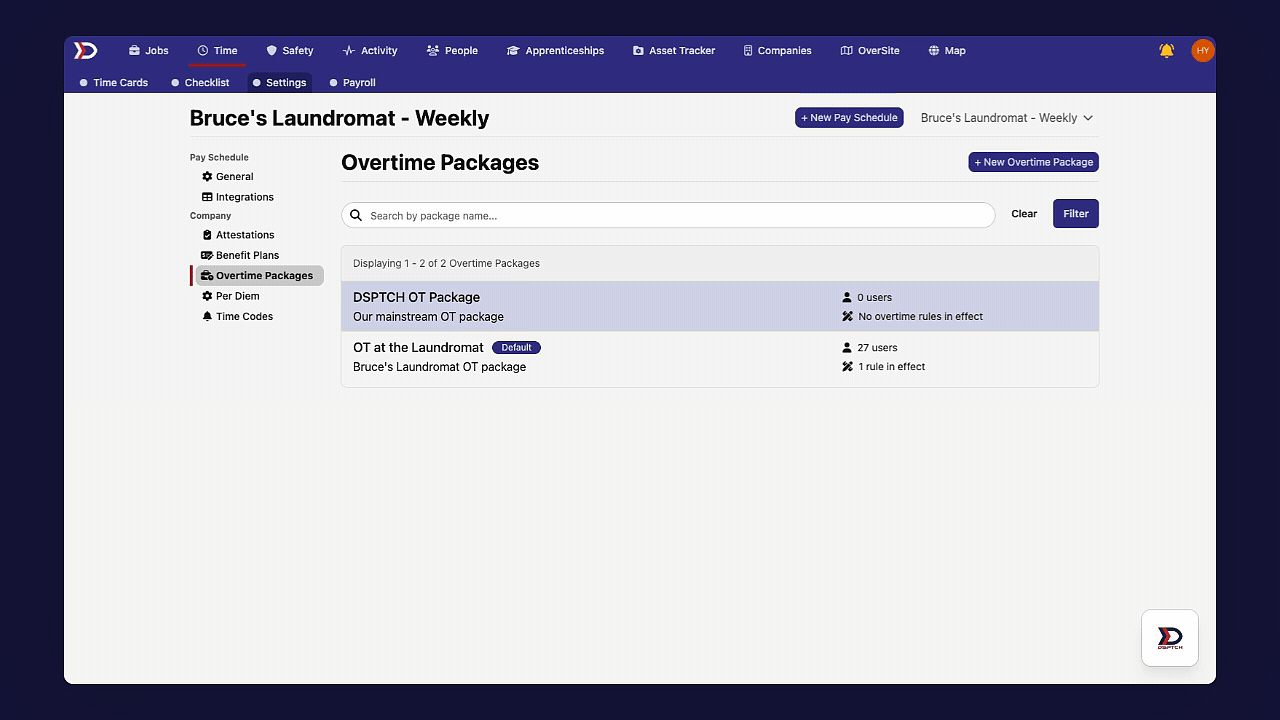
Navigate to Overtime Packages Page
To navigate to the "Overtime Packages" page, start by clicking the "Time" tab from the primary navigation bar at the top of the page. Then, click the "Settings" tab from the sub-navigation bar near the top of the page. From the "Settings" page, click the "Overtime Packages" tab from the menu on the left side of the page. This will open the "Overtime Packages" page.
See the video below for a demonstration:
Creating New Overtime Packages and Overtime Rules
An overtime package is a collection of overtime rules that are applied to users within your company. This section of the guide will go over creating an overtime package and then adding overtime rules to it.
Creating a New Overtime Package
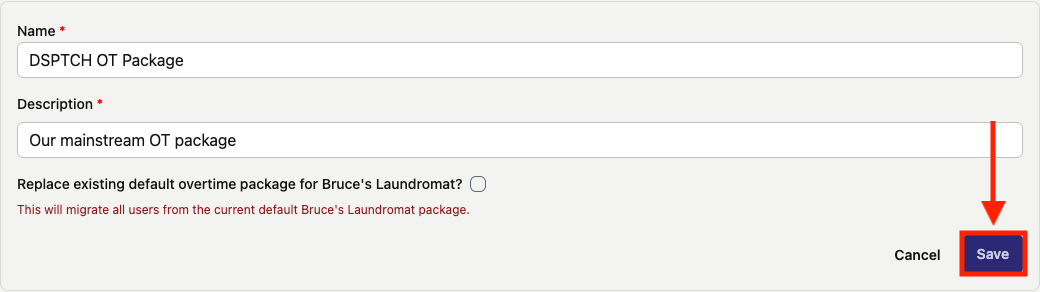
To create a new overtime package, start from the "Overtime Packages" page (navigation instructions above) and click the "+ New Overtime Package" button (indicated by the red box and arrow in the image below. This will open the "New Overtime Package" form.

There are several fields required fields (detailed below) to fill out (detailed below).
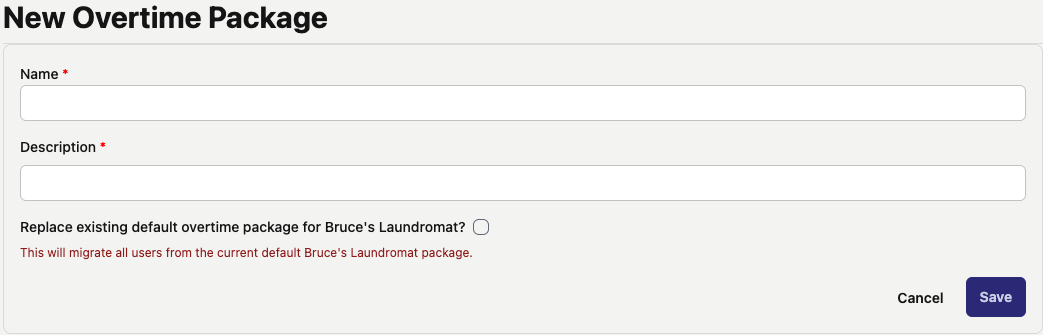
- Name (Required):
- Write in a name to help identify the overtime package.
- Description (Required):
- Provide a brief textual description to contextualize the overtime package.
- Default Toggle (Required):
- Toggle on to set the overtime package as the default overtime rules for all users in your company (unless otherwise stated).
Once finished, click the "Save" button in the bottom right corner of the form.
Creating a New Overtime Rule
To create a new overtime rule, click on an overtime package (see instructions above for creating a new overtime package). Then, click the "+ New Overtime Rule" button to open the "New Overtime Rule" form. Fill out the required/applicable fields (covered in detail below) and then click the "Save" button. The new overtime rule will be added to the relevant overtime package and automatically applied to all users within the overtime package.
See the video below for a demonstration:
New Overtime Rule Form

There are several fields in the "New Overtime Rule" form:
- Type (Required):
- Select "Daily" or "Weekly" from the dropdown menu.
- Daily Example:
- 1.5x Multiplier for all hours after 8 hours
- Weekly Example:
- 1.5x Multiplier for all hours after 40 hours
- Multiplier (Required):
- Select "Time and a Half (1.5x)" or "Double Time (2x)" from the dropdown.
- Hours to take effect after (Required):
- Set the hour threshold for when the overtime rule applies.
- Example:
- If an 8 was inputted, the overtime rule will apply after 8 hours.
- Date (Optional):
- Enter a specific date (in mm/dd/yyyy format) that the overtime rule should apply to.
- Example:
- On 7/4/25, all hours should be double time (2x)
- Day of Week (Optional):
- From the dropdown menu, select which day of the week that the overtime rule might apply.
- Example:
- On Saturday, all hours are double time (2x)
- Region (Optional):
- From the dropdown menu, which includes US Territories and Canadian Provinces, select which region the overtime rule applies to.
- If a Time Entry occurs in one of these regions, then the overtime rule will apply.
- Example:
- All hours after 12 hours per day in California earn double time (2x)
Custom Overtime Rule Example:
Let's create a new overtime rule that pays time and a half (1.5x) for all hours worked on Saturdays for users working in Illinois. Please see the "New Overtime Rule" form screenshot below for an example of how to create this rule:

Editing an Existing Overtime Package
To edit an existing overtime package, start from the "Overtime Packages" page (navigation instructions above) and click the pen and paper icon to the top right of the overtime package name (indicated by the red box and arrow in the image below).
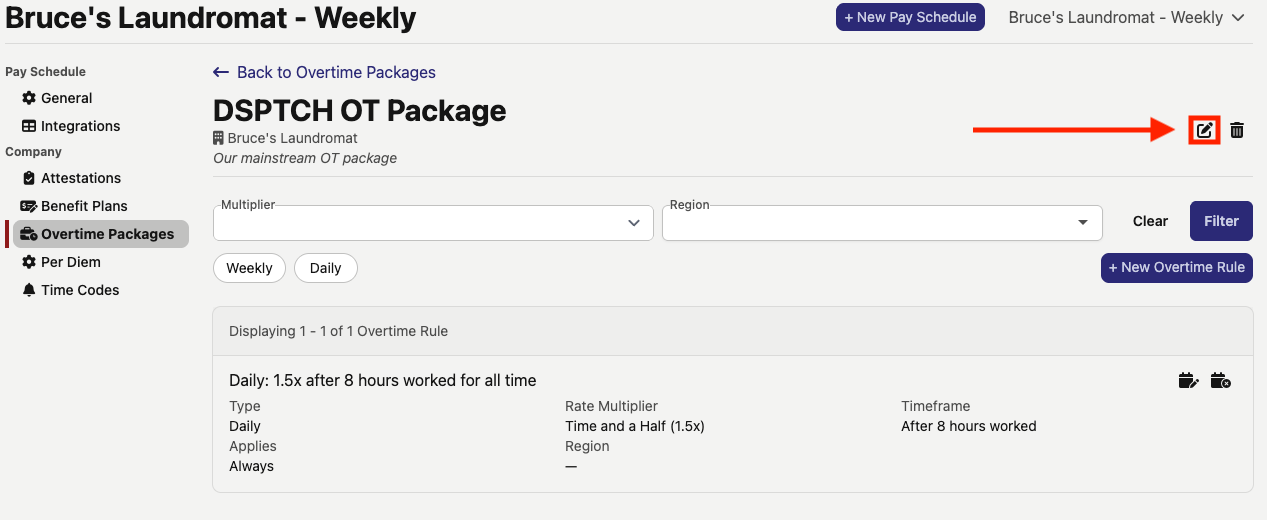
This will open the Edit Overtime Package form (which has the same fields as the "New Overtime Package" form, detailed above). Make all necessary changes to the Overtime Package (such as toggling off the Default Overtime Package field) and then click the "Save" button (indicated by the red box and arrow in the image below. All changes will be saved to the Overtime Package.
Scheduling a Change to an Existing Overtime Rule
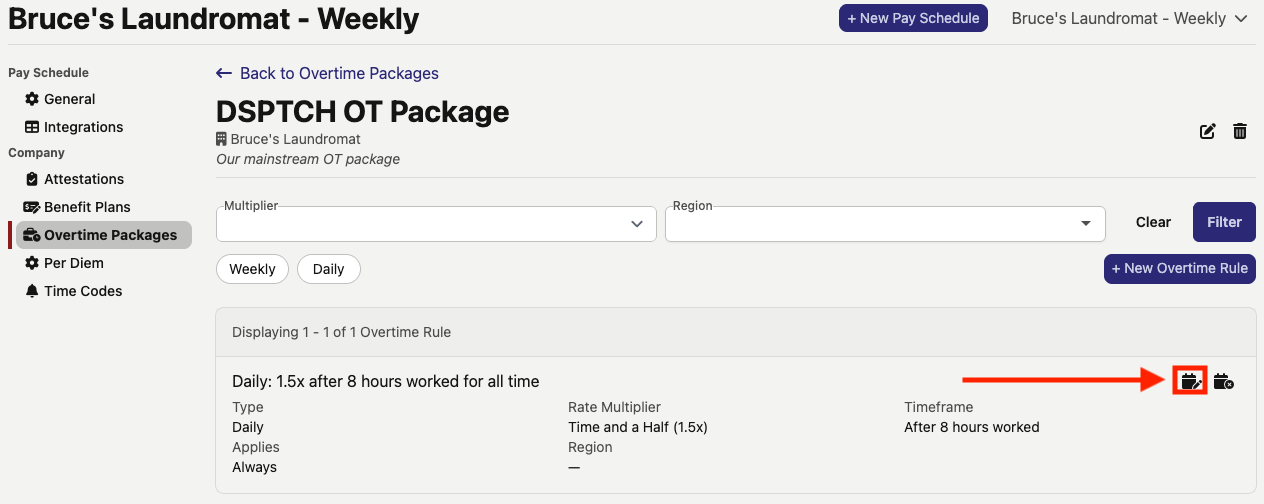
To schedule a change to an existing overtime rule, start from the "Overtime Packages" page (navigation instructions above) and click on the relevant overtime package. Then, click the calendar with a pencil icon to schedule a change (indicated by the red box and arrow in the image below).
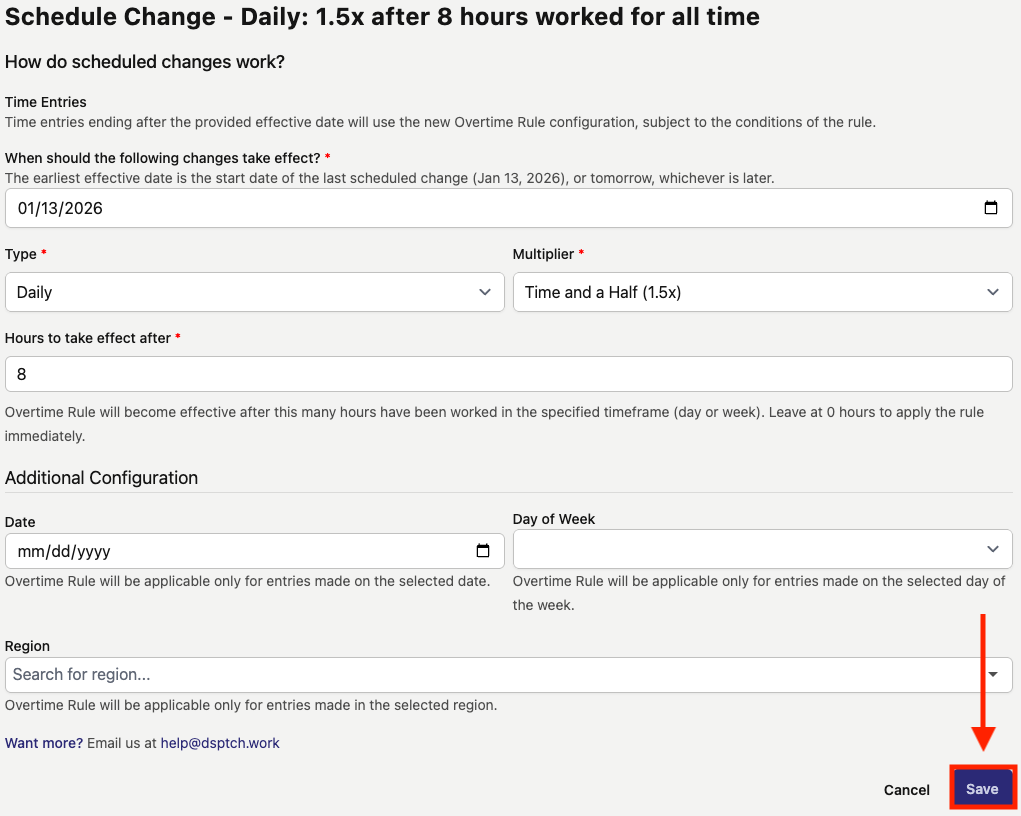
This will open the "Schedule Change" form for the overtime rule. This includes all of the same fields as the "New Overtime Rule" form (detailed above) with the addition of the "When should the following changes take effect?" field.
The "When should the following changes take effect?" field dictates the effective date for which the edited Overtime Rule will take effect. Edit the other fields as needed and click the "Save" button in the bottom right corner of the form (indicated by the red box and arrow in the image below).
Terminating an Existing Overtime Rule
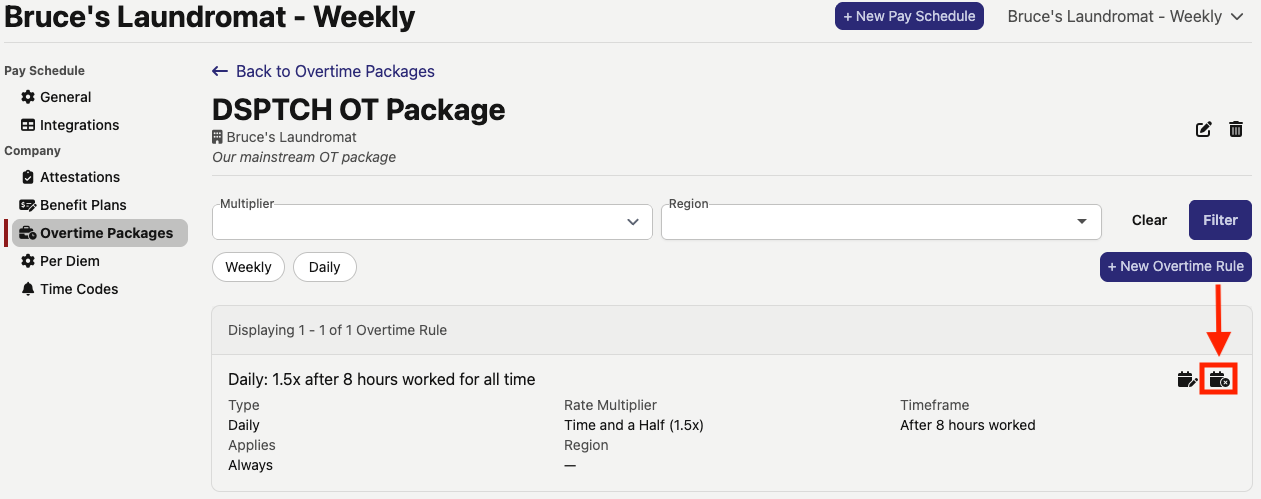
To terminate an existing overtime rule, start from the "Overtime Packages" page (navigation instructions above) and click on the relevant overtime package. Then, click the calendar with an X icon (indicated by the red box and arrow in the image below) to open the "Schedule Termination" form the for the overtime rule.
The "Schedule Termination" form is pictured below:

Set the date that the rule will be terminated in the "Termination Date" field and then click the "Save" button.