Jobs: Positions - Web
Table of Contents
- Creating New Positions
- Editing Existing Positions
- Deleting Positions
- Assigning Positions
- How Position Invite/Assignments appear on DSPTCH Mobile
Positions are how users are assigned to jobs. A position holds information like the function, wage determination, hourly rate, per diem, and schedule of an individual who is on the job. This information can be auto-filled, or inherit, the information from the user assigned to it - but the position object allows manual overrides of that information.
In this article we will go over how to create positions, how to assign users to them, what the settings do and how to change them.
Creating New Positions
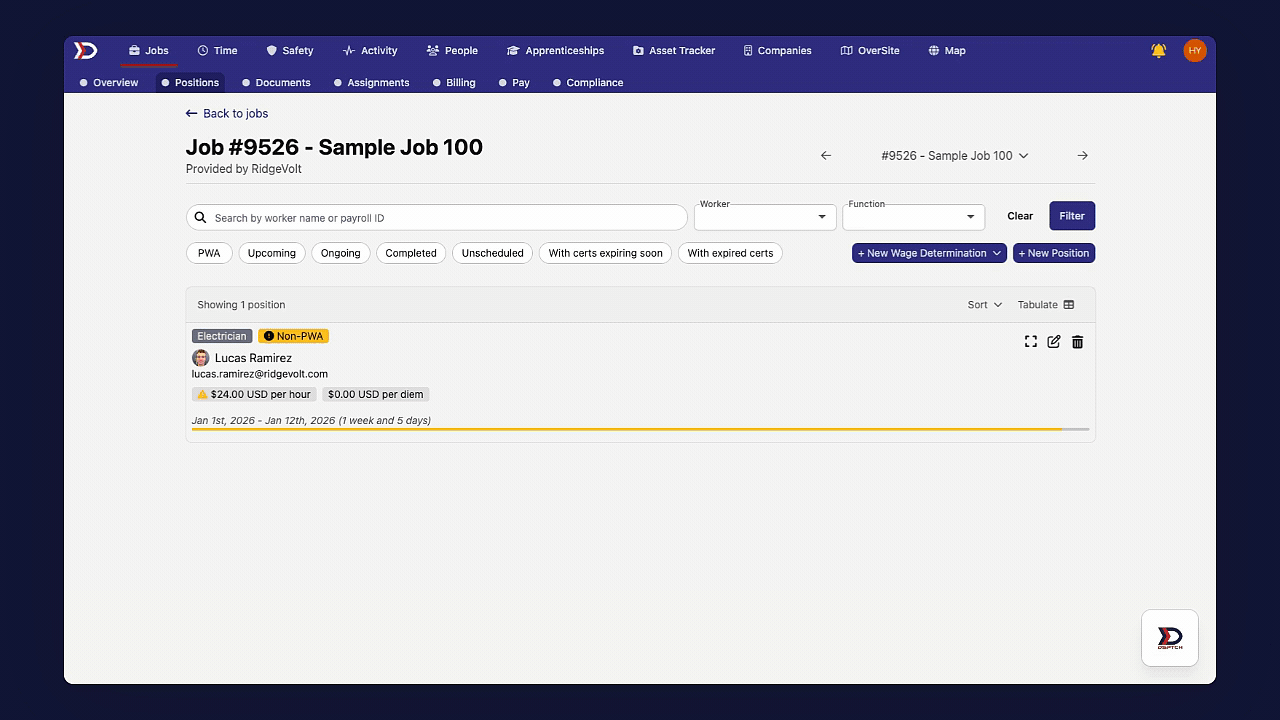
To create a new position, start by clicking on the "Jobs" tab in the primary navigation bar and at the top of the page. Then, select a job card. Once in the Job Card, navigate to the "Positions" tab and click the "+ New Position" button.
See video below for a demonstration.
There are several entry fields that need to be completed for the "New Position" form.

When creating new position(s), there are 3 options at the top:
- Assign - Choose names from a dropdown list that automatically assigns the selected users to the positions with the chosen settings. Multiple workers can be assigned to the same position at once (e.g. assigning multiple workers to an "ELECTRICIAN" Wage Determination).
- Invite - Choose names from a dropdown list that invites the selected users to the positions with the chosen settings. Invited users have the option to accept or reject the job assignment.
- Create - Creates a position with the chosen settings, but leaves it open for someone to be assigned/invited to it later. Create up to 10 of the same empty position at once with the Create option.
If you cannot see a user that needs to be assigned to the position, check your permissions and make sure that the user has created an account and is part of your company.
There are a few fields when creating a position:
- Assign / Invite Worker(s) (Required)
- Only available in the "Assign" or "Invite" option.
- Search for the name(s) of the worker(s) being assigned/invited to the position.
- Number of Positions (Required)
- Only available in the "Create" option.
- The number positions to create with the selected settings. For example, if the number of positions is set to 4 when you hit save, then 4 positions with the settings you have chosen will be created. The default value is 1, creating just 1 new position.
- Function (Optional)
- The job function the role will require. Search from a pre-defined list of functions.
- If you would like to request additional position functions, please let us know at help@dsptch.work!
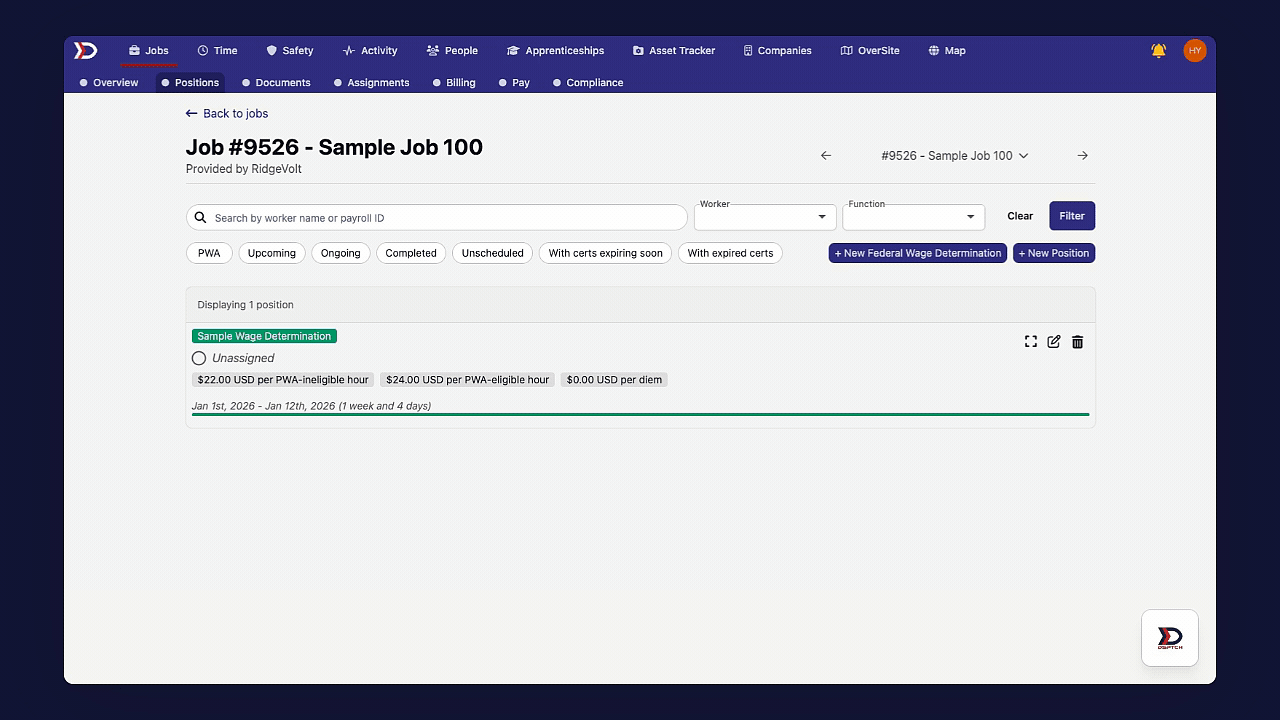
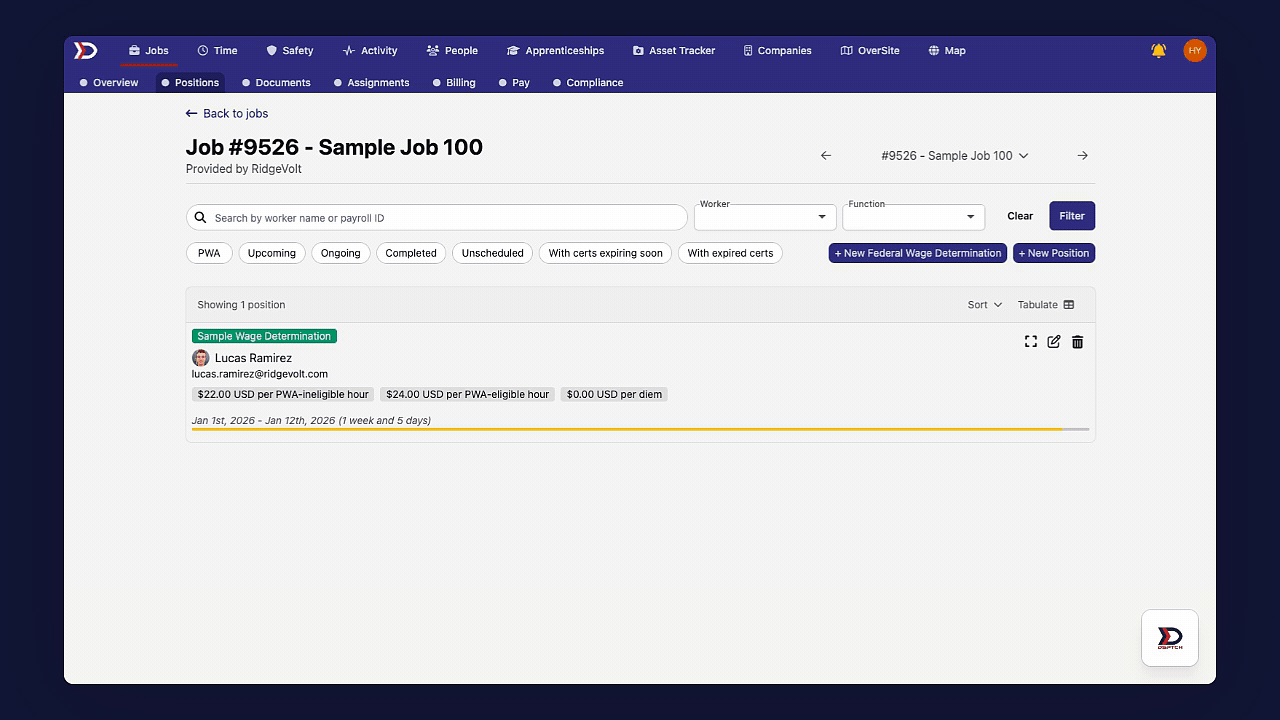
- Federal Wage Determination (Required)
- This option is only visible on jobs that have the prevailing wage and apprenticeship tracking option checked.
- If regional prevailing wage and apprenticeship tracking is enabled in the job, then a "Regional Wage Determination" field will appear as well.
- Enable Prevailing Wage and Apprenticeship (PWA) Tracking (Optional)
- Toggle this box on to enable PWA tracking compliance features such as Wage Determinations, Apprenticeship Hour tracking, and more.
- Regional Fields (Optional)
- If the job has been assigned to a region, certain regions will have regional fields. For example, Illinois has an "Employment Status" field.
- Hourly Rate (Optional)
- The hourly rate for the position. Enter a value to set the rate manually, or leave it blank to have it assume the default value of the user assigned to it.
- In most cases you will want to leave hourly rate blank and have it inherit values from the users base rate or the prevailing wage rate.
- Whenever hours are logged to by a user on the job, the hourly rate used will come from what is on the position they are assigned to.
- To learn more about how hourly rates are automatically assigned, and how they flow through to time entries and exports, check out our Hourly Rate help document.
- PWA Wage Pay Rate (Optional)
- The hourly rate for PWA-eligible time. By default, this field is filled by the PWA rate of the selected wage determination. If no wage determination is selected, then it will be blank.
- The value can be changed from the default value by entering a different rate manually after the wage determination is selected.
- Cash Fringe Rate (USD) (Optional)
- The amount of cash fringe that is pre-planned to be for this position. If left blank, the required fringe amount will still be automatically calculated by DSPTCH.
- Wage Adder Rate (USD) (Optional)
- The amount of additional wages to be paid for the position and not used for compliance calculations. Entering a value in this field will result in higher take-home pay for the position.
- Per Diem (Required)
- The per diem that will be applied when a user assigned to the position creates a time entry for the job. The available options come from the company who created the job's per diem settings.
- Start Date (Required)
- Start date of the position.
- End Date (Required)
- End date of the position. This can be edited after the position is initially created.
The start and end dates have important implications for users - if it is before the start date or after the end date, a user may not be able to submit time to a job!
There is a grace period after the end date of 1 week where users can still submit time to that job.
Once all fields have been filled in, click "Save" in the bottom right corner of the form to create the position(s).

Editing existing Positions
To edit a position, navigate to the "Positions" tab (explained above here) and click the pencil icon on the right hand side of the position (indicated by the red box and arrow in the image below).

This will open the "Edit Position" form, which has the same fields as the "New Position" form but with the existing options selected. Change the fields as needed and click the "Save" button to apply the changes.
Changes in hourly rate will affect time entries that have not yet been submitted for approval.
Changes to Per Diem will only take affect going forward.
Deleting Positions
To delete a position, navigate to the "Positions" tab (explained above here) and click the trash can icon to the right of the position name. A confirmation prompt will appear - click "OK" to delete the position.
See video below for a demonstration:
If a position has time entries tied to it, it will be unable to be deleted.

Assigning Positions
If the "Create" option was used to create a position, the position functions only as a placeholder. To enable users to submit time to a job and apply the position's settings, a user must be assigned to that position.
To assign or invite a user to a position, navigate to the "Positions" tab (explained above here) and click the pencil icon on the right hand side of the position.
This will bring the "Edit Position" form. Search for the user you want to Assign or Invite by typing in their name and select them, and then click "Save" at the bottom right of the form. See video below for illustration.
Invite
Inviting a user gives them the option to accept or reject your job offer. The process to invite a user is identical to the assigning process detailed above with the exception of clicking the "Invite" tab during the edit process instead of the "Assign" tab.
Once a user accepts, the offer, they will be assigned to that position. If they decline, the offer will be revoked.
Offers can be revoked before acceptance by editing the Position and clicking the "x" next to the individual's name in the dropdown menu.
You can send out multiple invites to a position. Only one user can be assigned to a position though - so whoever accepts first will get the job!
Editing Assignment
If a user has not created any time entries tied to that job/position, then you can remove them by editing the position and clicking the "x" on the right of the assign user dropdown.
The position will then be open to invite/assign other users.
See video below for a demonstration:
If a position has time entries tied to it, it will not be able to be re-assigned. You will have to create a new position if you want to assign a user to the job.
How Position Invite/Assignments appear on DSPTCH Mobile
For a detailed overview of how Position Invitation/Assignments appear on DSPTCH Mobile from the technicians perspective, read our Job Invites and Assignments – Mobile help document.