Jobs: Wage Determinations - Web
Table of Contents
- Navigating to Wage Determinations
- Wage Determinations
- Creating a New Wage Determination
- Editing a Wage Determination
- Applying a Wage Determination to Positions
- Creating a Non-PWA Position on a PWA Job
- Exporting PWA Information
For jobs that have Prevailing Wage & Apprenticeship (PWA) tracking enabled, DSPTCH allows for the creation and assignment of wage determinations to ensure compliance with PWA standards. To learn how to enable PWA tracking, please read our Create a Job help document.
Navigating to Wage Determinations
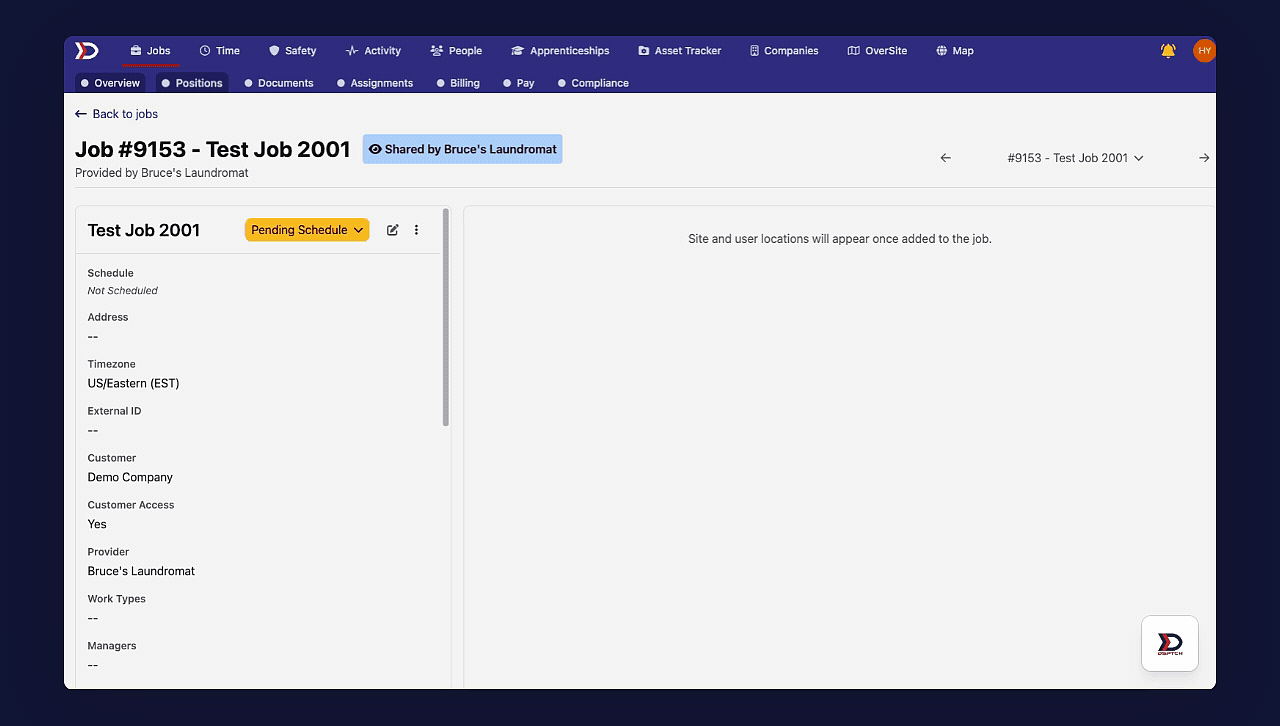
To navigate to the "Wage Determination" page, start by clicking on the "Jobs" tab from the primary navigation bar at the top of the page. Then, click on the relevant job card. Next, click the "Compliance" tab from the sub-navigation bar at the top of the page. Lastly, click the "Wage Determination" tab from the menu on the left side of the screen. This will open the "Wage Determination" page.
See the video below for a demonstration:
Wage Determinations
A wage determination is a listing of the prevailing wage rates and fringe benefit rates for a specific type of construction work in a given area.
Wage determination rates may be provided by your client, or can be found from official wage determinations on SAM.gov

Creating a New Wage Determination
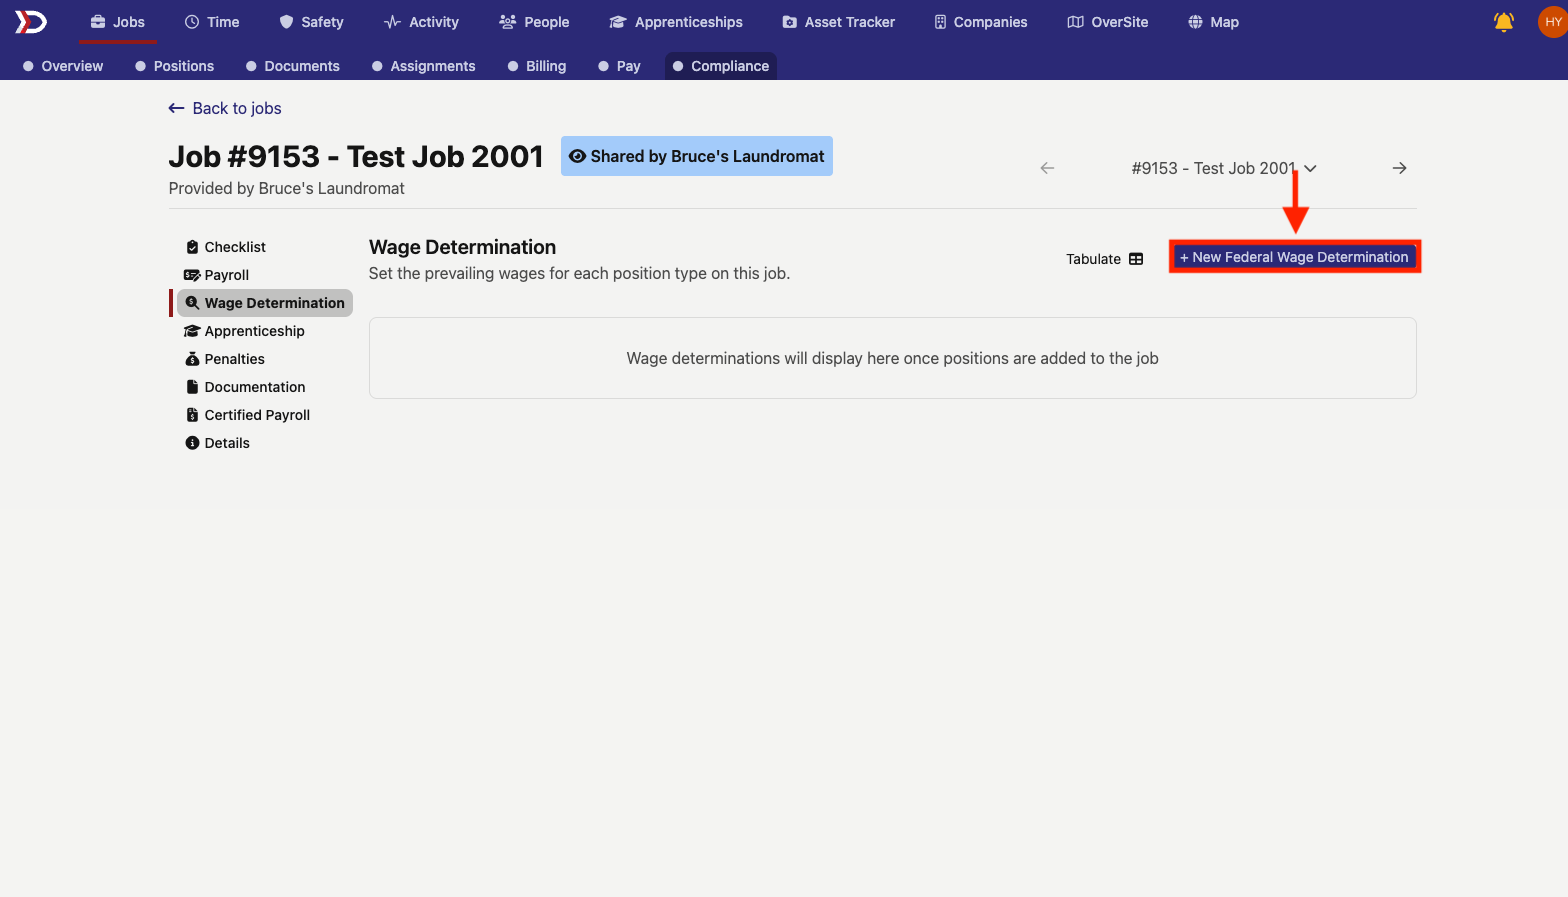
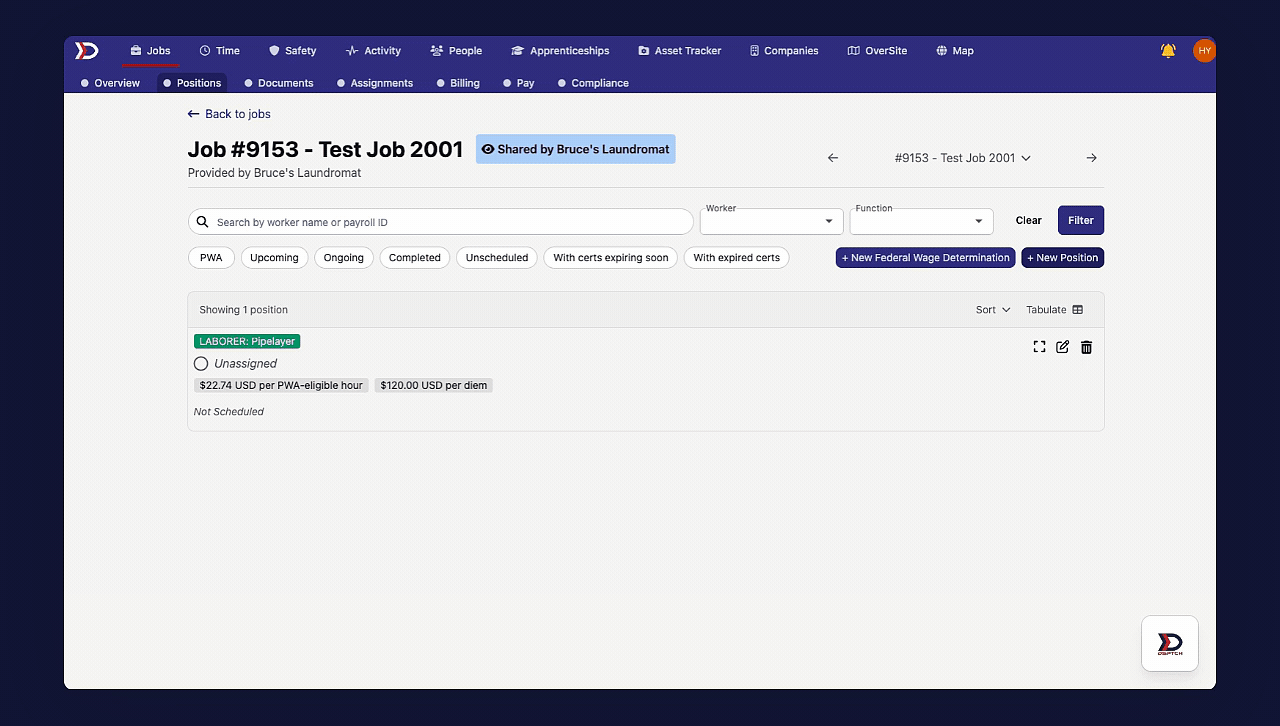
From the "Wage Determination" page, click the "+ New Federal Wage Determination" button at the top right of the page (indicated by the red box and arrow in the image below). This will open the "New Federal Wage Determination" form.
If you do not see the "Compliance" tab, be sure that you have selected the "Prevailing Wage & Apprenticeship" or "Prevailing Wage Only" within the job settings to enable it.
Fill out the wage determination information based upon the wage determination sheet that applies to your job.
The image below shows an example of a wage classification, and where the required values are on the sheet.

Using "LABORER: Pipelayer" from the image above as an example, a filled out "New Federal Wage Determination" form would look like this:

- Labor Classification (Required):
- The name of the Labor Classification from the reference document or Wage Determination.
- Classification Code (Optional):
- 12-digit Alphanumeric ID for the Labor Classification. A classification code can have multiple labor classifications.
- Wage Rate (Optional):
- The wage rate, in dollars, of the Labor Classification.
- Fringe Rate (optional):
- The fringe rate, in dollars, of the Labor Classification.
- General Wage Determination (Optional):
- The reference number of the Wage Determination document.
- Formatted as <State><Year><Number>/<Revision>
- This can be found on the document, or on the suffix of the URL for the Wage Determination.
- Category (Required):
- The DOL prevailing Wage Determination category
- Options: Building, Highway, Heavy, or Residential
- Treasury Guidance (Optional):
- A file upload for any document with explicitly issued treasury guidance for a given Wage Determination
- Rationale (Optional);
- A file upload for any document with an explanation for a Wage Determination

After filling out all required fields, click the "Save" button at the bottom right of the form to create the wage determination.
A success message reading, "Wage determination was successfully created" will appear at the bottom right of the screen (pictured below):

Editing a Wage Determination
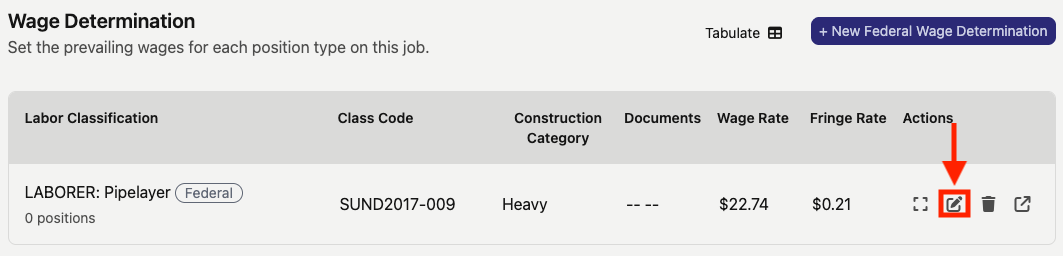
To edit a wage determination, click the pencil and paper icon near the right side (indicated by the red box and arrow in the image below).
This will pull up the "Edit Federal Wage Determination" form, which is has identical fields as the "New Federal Wage Determination" form, but with the existing settings already inputted.
Changes to the wage rate may cause hourly rates to change on positions. Check out our Hourly Rates article to learn more.
Applying a Wage Determination to Positions
After wage determinations are created in DSPTCH, they will need to be applied them to positions to take effect.
For more detailed information on the "Positions" tab, check out our help doc here. This will cover how to create & edit positions as well as how to invite/assign workers to fill them.
To add a wage determination to a new position, open a "New Position" form by clicking on the "+ New Position" button in the "Positions" tab of a job card. In the form, click on the "Federal Wage Determination" field to open the dropdown menu of created wage determinations for the job and select the appropriate wage determination from the list that have been created for the job.
Then, ensure that the "Enable Prevailing Wage and Apprenticeship Tracking" box is toggled on.
See video below for a demonstration:
To edit a position and add/change a wage determination, click the pencil icon on the right side of the position (indicated by the red box and arrow in the image below). This will open the "Edit Position" from, which is identical to the "New Position" form with the fields filled in with the current information. Then, click on the "Federal Wage Determination" to open the dropdown menu of wage determinations for the job and select the appropriate wage determination. Next, click the "Save" button in the the bottom right corner of the form.

When a wage determination is applied onto a position, it will be visible as a green rectangle on the position. The wage determination rate in dollars ($) can be viewed when moused over.

Creating a Non-PWA Position on a PWA Job
For more detailed information on "Positions," check out our help doc here. This will cover how to create & edit positions as well as how to invite/assign workers to fill them.
To create a new position with no PWA tracking, start by clicking the "+ New Position" button in the "Positions" tab of a job. Fill out the required fields for the position (more information in the Positions help document). Then, toggle off the "Enable Prevailing Wage and Apprenticeship Tracking" box. Lastly, click the "Save" button. The new position will be created and designated as "Non-PWA".
See the video below for a demonstration:
Exporting PWA info
DSPTCH has exports specific to PWA and government requirements. These include:
- A WH347 export
- A payroll-friendly export of hours and rates with wage determination names
WH347
Read our documentation here.
Payroll
The PWA export for payroll includes additional columns the base payroll export does not have, such as fringe amounts and separating out users regular and prevailing wage rates.
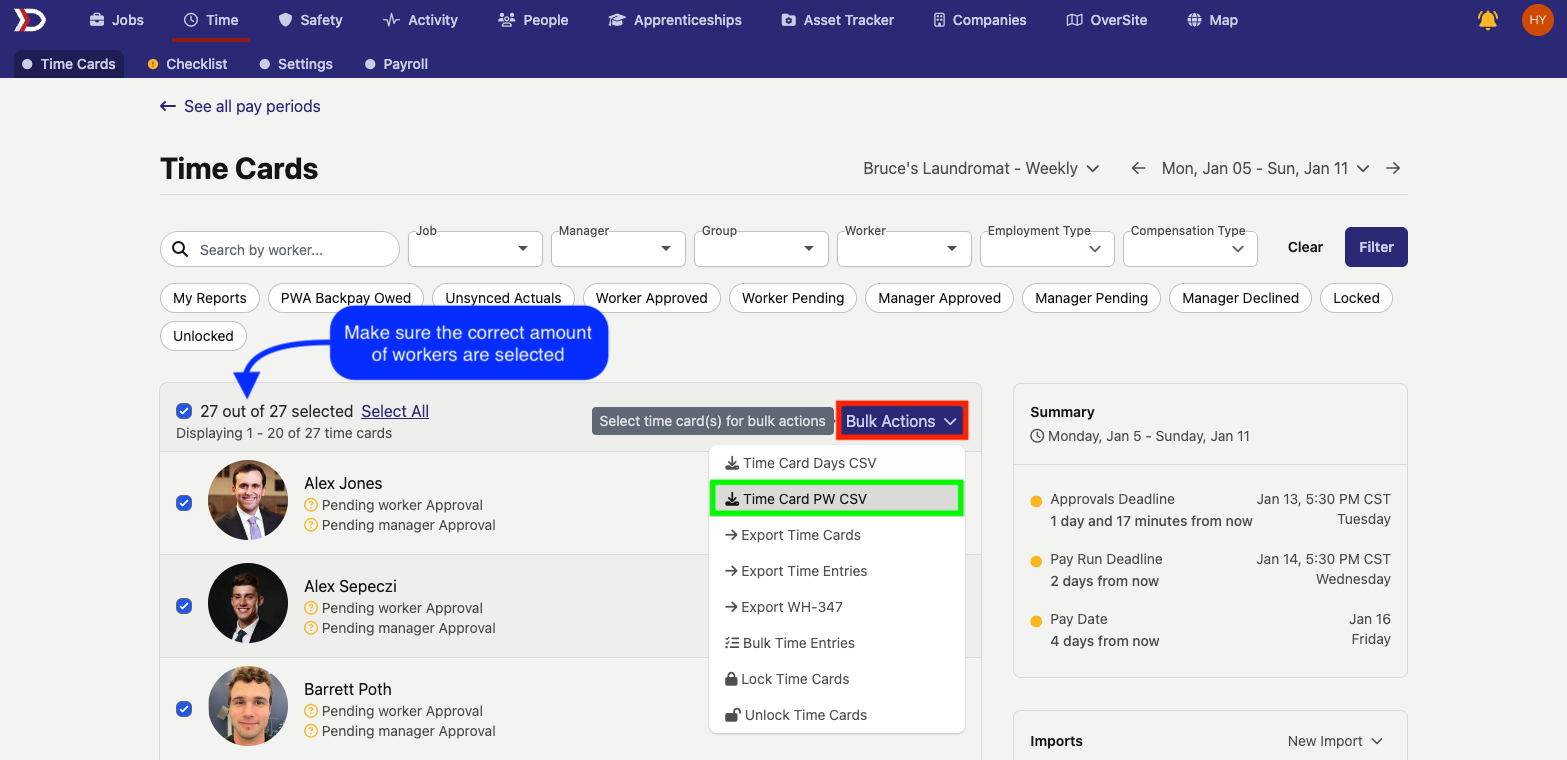
To access this export, follow these steps:
- Navigate to the "Time" tab, ensure the correct company payroll and pay period (week) is selected
- Select all necessary users to export
- Click the "Exports" button (indicated by the red box in the image below)
- Click "Time Card PW CSV" (indicated by the green box in the image below)