Apprenticeships: Overview – Web
Table of Contents
- Navigating To and Within the Apprenticeships Tab
- Apprenticeships Job Data Dashboard
- How to Create an Apprenticeship Program
- How to Create a New Apprentice
- How to Create a New Occupation
- How to Create a Wage Schedules
- How to Create a New Work Process Category
- Tracking Apprentices' Progress
- How Apprentices Can Allocate Hours Towards Their Apprenticeship Program
The "Apprenticeships" tab in DSPTCH offers data tracking for apprentice hours/ratio on jobs, visibility into an apprentice's individual progress, the ability to create custom wage progression schedules as apprentice's accrue hours, and a way for apprentices to allocate hours from their time cards to their program.
Navigating To and Within the Apprenticeships Tab
Navigating To the Apprenticeships Tab
First, click the "Apprenticeships" tab from the primary navigation bar at the top of the page. This will open the "Overview" page.
See video below for a demonstration:
The "Overview" page contains several useful dashboards:
Program Information Dashboard
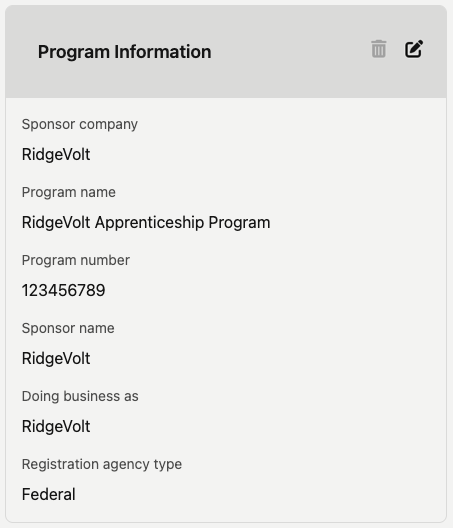
The "Program Information" dashboard contains basic info about your apprenticeship program. This includes the sponsor company's name, the apprenticeship program name, the apprenticeship program number, the official sponsor name, the doing business as name for the sponsor, and if the apprenticeship program is federal or regional.
Apprentice Availability Dashboard

The "Apprentice Availability" dashboard shows a daily breakdown of the number of apprentices which were assigned to a job and the number of apprentices which were unassigned to a job (e.g. "Available").
Time Allocations Dashboard

The "Time Allocations (%)" dashboard displays the percentage of hours which apprentices have logged that has or has not been allocated towards their apprenticeship program. For more information on the allocation process, please read the "Allocating Apprenticeship Hours" section of the help document.
Employers Dashboard
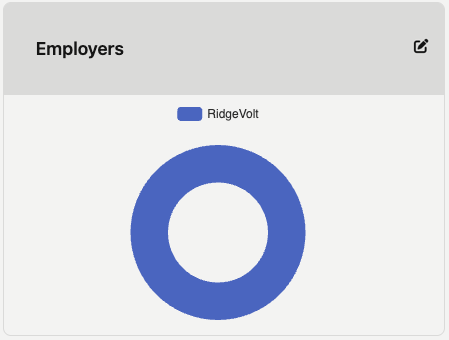
The "Employers" dashboard shows the percentage of apprentices within each apprentice program that are employed by a given employer. For an apprentice program with only one employer (as shown in the image above), the ratio will be 100%.
Apprentice Statuses Dashboard
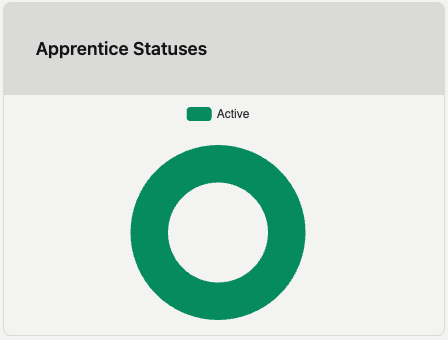
The "Apprentice Statuses Dashboard" shows the percentage of apprentices that falls into each status category. The status categories include active, cancelled, completed, denied, overdue, pending, registered, and suspended.
Documents Dashboard

The "Documents" dashboard shows a list of all uploaded apprenticeship program documents which can be accessed by apprenticeship program managers.
Navigating Within the Apprenticeships Tab
Apprentices Tab:
The "Apprentices" tab contains a list of all apprentices within your apprenticeship program. Click the "Apprentices" tab in the sub-navigation bar at the top of the screen to navigate to it.
Additionally, the "Apprentices" tab displays each apprentice's individual progress (e.g. number of hours logged). Clicking on an individual apprentice will open a page that displays their progress in each of the work process categories included in their apprenticeship program.
See the video below for a demonstration:
Occupations Tab:
The "Occupations" tab contains a list of all occupation types within your apprenticeship program. Click the "Occupations" tab in the sub-navigation bar at the top of the screen to navigate to it.
Each occupation represents a category that apprentices are training towards (eg.. Wind Turbine Technician). Adding multiple occupations to the same training program enables for apprentices to have different training requirements. Each occupation will contain high level overview information such as the total term length of the training, the probation period length, and the required ratio of apprentices to journeyworkers.
By clicking on an occupation, a more detailed breakdown will populate.
See the video below for a demonstration:
Apprenticeship Job Data Dashboard
Navigating to the Dashboard
Jobs that are created with the "Prevailing Wage and Apprenticeship Tracking" feature enabled provide visibility into the apprentice to journeyworker ratio and total apprentice hours % for all companies involved. To learn how to create a job with "Prevailing Wage and Apprenticeship Tracking" enabled, check out our guide here.
To view apprentice data for a job, start by clicking on the "Jobs" tab in the primary navigation bar. Then, click on the relevant job card and navigate to the "Compliance" tab in the sub-navigation bar. Lastly, click the "Apprenticeship" button from the menu on the lefthand side of the screen.
See the video below for a demonstration:
Data Included in the Dashboard
There are several sections to "Apprenticeship" data dashboard.
Labor Hours Section:
The "Labor Hours" section displays the current % of hours worked by apprentices for the job, the total number of apprentice hours, and the total number of journeyworker hours.
For jobs requiring compliance with prevailing wage and apprenticeship (PWA) standards, 15% of the total labor hours for a project must be worked by apprentices for projects beginning construction on or after January 1, 2024.

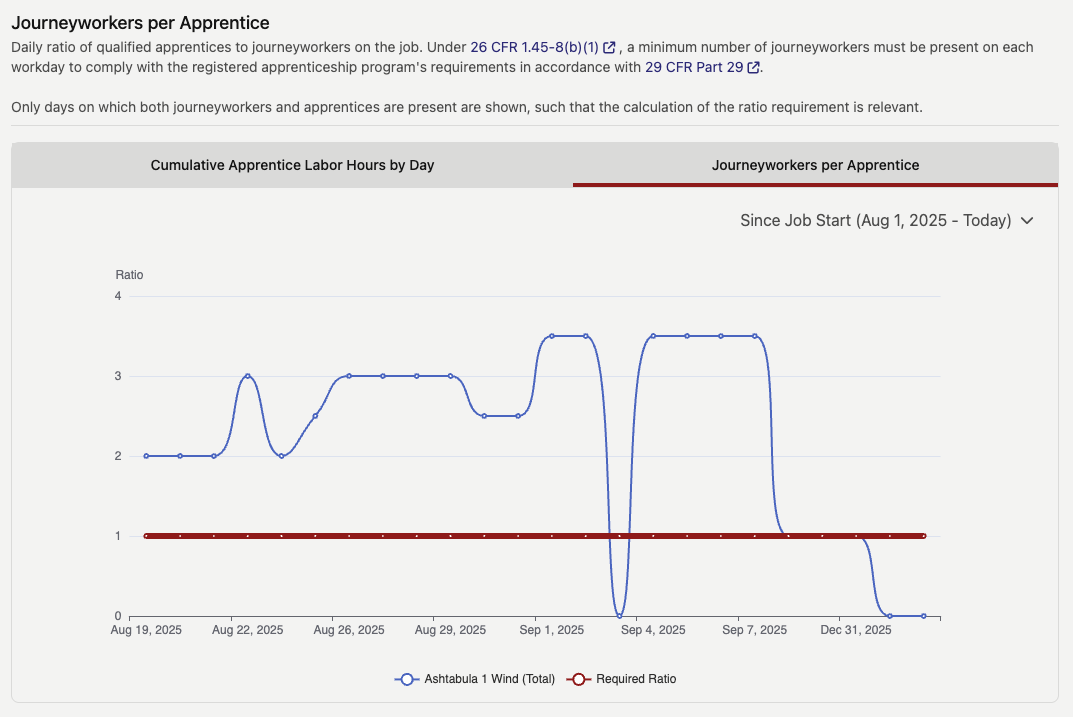
Graph Section:
There are two graphs that display relevant apprentice information for the job. The first graph is the "Cumulative Apprentice Labor Hours by Day" graph and displays the cumulative percentage of hours worked by apprentices out of total hours on the job over time. The red line represents the minimum % of total hours required to be worked by apprentices.

The second graph is the "Journeyworkers per Apprentice" graph and displays the daily ratio of qualified apprentices to journeyworkers on the job. To view the graph, click on the "Journeyworkers per Apprentice" tab in the section. The red line displays the minimum ratio of journeyworkers to apprentices required.
How to Create an Apprenticeship Program
Navigating to Create New Apprenticeship Program Field
To create an Apprenticeship Program, start by navigating to the "Apprenticeships" tab from the top navigation bar. Then, click "+ New Program." See the video below for illustration.
Create New Apprenticeship Program Form
There are several entry fields that must be filled out in the "New Program" form.

- Sponsor Company (Required)
- The name of the company sponsoring the apprenticeship program. The sponsor company must have a profile created in DSPTCH (reach out to help@dsptch.work if there is no profile).
- Program Number (Required)
- The RAPIDS number for the program
- Program Name (Required)
- The name of the program
- Sponsor Name (Required)
- The name of the sponsor for the program
- Doing Business as (Optional)
- The doing business as name for the program
- Employers Company (Required)
- The company employing apprentices in the program
- Require DSPTCH Time Card Toggle (Optional)
- If toggled on, apprentices will be required to use DSPTCH timekeeping to allocate hours towards their progress
After entering all of the required fields and clicking "Save," the Apprenticeship Program will be created.
How to Create a New Apprentice
Start by clicking the "Apprenticeships" tab from the primary navigation bar at the top of the page. Then, click the "Apprentices" tab from the sub-navigation bar near the top of the page. Lastly, click the "+ New Apprentice" button. This will open the "New Apprentice" form.
See video below for a demonstration:
There are several fields which need to be filled out in the "New Apprentice" form:

- User (Required)
- The name of the user being added as an apprentice.
- NOTE: The user must have an existing user profile in DSPTCH to be added an apprentice. Please reach out to help@dsptch.work if the desired user does not have an existing profile.
- Status (Required)
- The status of the apprentice.
- Options include: Active, Cancelled, Completed, Denied, Overdue, Pending, Registered, and Suspended
- Employer (Required)
- The company which employs the apprentice.
- NOTE: The employer company must have an existing company profile in DSPTCH to be added as an employer. Please reach out to help@dsptch.work if the desired company does not have an existing profile.
- Expected Start Date (Required)
- The date (in mm/dd/yyyy format) which the apprentice is expected to begin training in the apprentice program. This can always be edited later.
- Expected Completion Date (Required)
- The date (in mm/dd/yyyy format) which the apprentice is expected to complete training in the apprentice program. This can always be edited later.
- Wage Schedule (Required)
- The wage progression schedule which the apprentice will follow as they accrue hours in the apprenticeship program.
- NOTE: For more information on wage progression schedules (and how to create them), check the "How to Create a Wage Progression Schedule" section of this help document.
- DOL Certification (Optional)
- A file upload field for any DOL certification documentation.
- RAPIDS Information (Optional)
- A file upload field for any RAPIDS information documentation.
- Custom Fields (Optional)
- Any custom fields created can be added here. For more information on custom fields, please review our help document here.
After filling out all required fields, click "Save" at the bottom right of the screen to create the new apprentice. The new apprentice will appear in the list of apprentices on the "Apprentices" tab.
In the event that the "+ New Apprentice" button is grayed out with the text "You do not have permission to add a new apprentice" there are two possible problems:
(1) Your DSPTCH account does not have admin permissions
(2) There are no occupations that have a defined wage progression schedule. For instructions on how to create an occupation and resolve the error, please read the How to Create a New Occupation section and the How to Create a Wage Progression Schedule section below.
How to Create a New Occupation
Start by clicking the "Apprenticeships" tab from the primary navigation bar at the top of the page. Then, click the "Occupations" button from the sub-navigation bar near the top of the page. Lastly, click "+ New Occupation". This will open the "New Occupation" form.
See video below for a demonstration:

There are several fields which need to be filled out in the "New Occupation" form:

- Title (Required)
- The title of the occupation. This will be displayed as the label on the "Occupations" tab.
- Type (Required)
- The type of apprenticeship program
- Options include: Time-Based, Competency Based, or Hybrid.
- RAPIDS Code (Optional)
- The RAPIDS code associated with the occupation.
- Number of Apprentices (Required)
- The number of apprentices from the required ratio of apprentice to journeyworker for the occupation outlined by RAPIDS.
- For example, if the required ratio of apprentices to journeyworker is 1:3, enter "1" in the "Number of Apprentices" field.
- Number of Journeyworkers (Required)
- The number of Journeyworkers from the required ratio of Apprentice to Journeyworker for the Occupation outlined by RAPIDS.
- For example, if the required ratio of Apprentices to Journeyworker is 1:3, enter "3" in the "Number of Journeyworkers" field.
- Minimum Hours (Required)
- For time-based occupations, this is the minimum number of hours which an apprentice can allocate towards the occupation and graduate.
- Maximum Hours (Required)
- For time-based occupations, this is the maximum number of hours which an apprentice can allocate towards the occupation before they graduate.
- Probation Length (Required)
- The number of hours which an apprentice must allocate towards the occupation to progress past the probation period.
- Worker Process Appendix (Optional)
- A file upload field for any worker process appendix documentation.
- Description (Optional)
- A free text field to provide a description of the occupation.
Once all required fields have been filled out, click the "Save" button in the bottom right corner to finish creating the occupation. The occupation will now appear with the others on the "Occupations" tab.
How to Create a Wage Schedule
Apprenticeship programs allow for the creation of customizable wage progression schedules. These wage progression schedules ensure that as apprentices accumulate hours, their wage rates automatically adjust upward once predefined thresholds are surpassed.
Navigating to the New Wage Schedule Form
Start by clicking the "Apprenticeships" tab from the primary navigation bar at the top of the page. Then, click the "Occupations" button from the sub-navigation bar near the top of the page. Click on the occupations which needs a new wage progression schedule within your apprenticeship program. This will open the occupation card. Locate and click the "+ New Wage Schedule" button. This will open the "New Wage Schedule" form.
See the video below for a demonstration:
New Wage Schedule Form
There are several fields that must be filled out to create a new wage progression schedule.
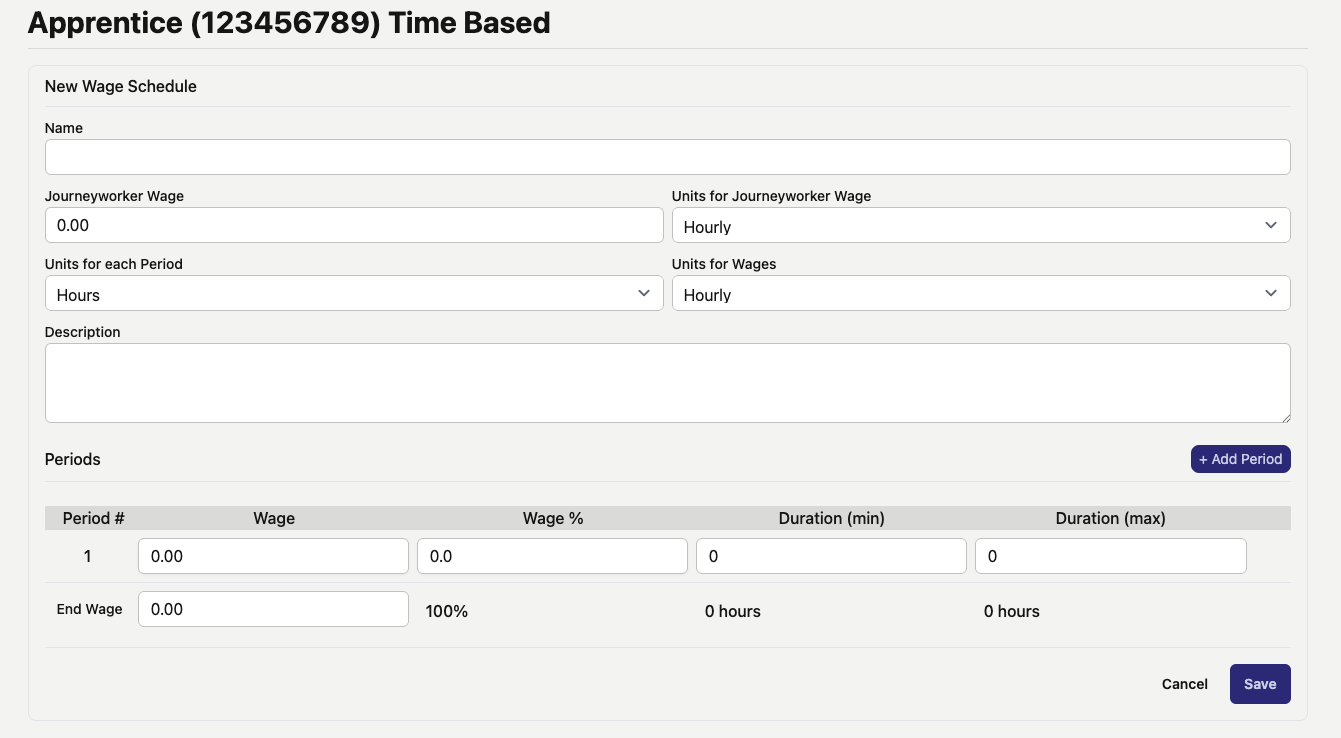
- Name (Required)
- The name of the wage progression schedule
- Journeyworker Wage (Required)
- The full wage rate of a journeyworker (i.e. the rate a non-apprentice would earn)
- Units for Joureyworker Wage (Required)
- The time interval of the journeryworker wage (e.g. hourly, weekly, monthly, quarterly, semi-annually, annually)
- For example, $/hour, $/week, $/month, etc.
- Units for Each Period (Required)
- The unit of time used to track progress for each period of the wage progression schedule (e.g. after 1000 hours, apprentice passes from period 1 to period 2 of the wage progression schedule)
- Units include: hours, weeks, months, quarters, semi-annual, and annual
- Units for Wages (Required)
- The time interval of the apprentice wage (e.g. hourly, weekly, monthly, quarterly, semi-annually, and annually)
- For example, $/hour, $/week, $/month, etc.
- Description (Optional)
- A textual description of the wage progression schedule
- Periods Table (Required)
- For each period of the wage progression schedule, enter in the % of the journeyworker wage that the apprentice will earn, the min/max number of hours to progress from the period, the number of competencies to progress from the period, and an optional description.
- Example:
- Journeyworker wage = $30
- Period 1:
- Wage ($): $15
- Wage (%): 50%
- Min Duration: 1000 hours
- Max Duration: 2000 hours
- Period 2:
- Wage ($): $20
- Wage (%): 66.66%
- Min Duration: 1000 hours
- Max Duration: 2000 hours
- In this example, as the apprentice accrues hours, their wage will increase to become closer to the journeyworker wage.
- Add Period (Optional)
- Option to add an additional period beyond the first period
How to Create a New Work Process Category
A primary component of an apprenticeship program on DSPTCH are the work process categories involved. Each work process category represents a specific type of training, such as First Aid, Electrical, Mechanical, or Blade Inspection, and specifies the minimum and maximum number of hours apprentices must complete before progressing in the program. Each occupation within the apprenticeship program can have its own work process categories.
How to Create a New Work Process Category
Start by clicking the "Apprenticeships" tab from the primary navigation bar at the top of the screen. Then, click the "Occupations" button from the sub-navigation bar at the top of the screen. Click on the occupation which needs a new work process category within your apprenticeship program. This will open the occupation card. Scroll down and locate/click the "+ New Work Process Category" button. This will open the "New Work Process Category" form.
See the video below for a demonstration.
There are several entry fields that must be filled out to create a new work process category.

- Name (Required)
- The name of the work process category that will be visible to all apprentices in the program
- Minimum Hours (Required)
- The minimum hours that an apprentice must allocate towards the work process category to be considered proficient
- Maximum Hours (Required)
- The maximum hours that an apprentice can allocate towards a work process category
- Description (Optional)
- A textual description of the work process category and what it encompasses
After filling in the required fields and clicking save, the work process category will appear in the "Work Process Categories" list within the occupation card. Apprentices can now begin allocating hours towards the work process category.

Editing/Deleting a Work Process Category
To edit an existing work process category, click the pencil and paper icon on the right side of the work process category (indicated by the red box in the image below). If the work process category needs to be deleted, click the trashcan icon (indicated by the green box in the image below).

This will open the "Edit Work Process Category" form.

All fields in the "Edit Work Process Category" form are editable. For a breakdown of each field, please see the description in the How to Create a New Work Process Category section directly above. Once all edits are made, click the "Save" button.
Tracking Apprenticeship Progress
DSPTCH apprenticeships enables real-time tracking of apprentices progress as they allocate hours towards their work process categories.
How to Track Apprenticeship Progress
To track apprenticeship progress, start by navigating to the "Apprenticeships" tab from the primary navigation bar near the top of the screen. Next, click the "Apprentices" tab from the sub-navigation bar near the top of the screen. The "Apprentices" page contains a dashboard of all the apprentices in your company's program and their overall progress measured in hours.
Click on an individual apprentice to open a page that displays their progress in each of the work process categories included in their apprenticeship program.
See the video below for a demonstration:

For each apprentice, there is a more granular view of their progress in each work process category that can be accessed by clicking on an apprentice's profile. There is also visibility into which time cards the hours from each work process category have been allocated from by click the "View Allocations" button (indicated by the red box in the image below).

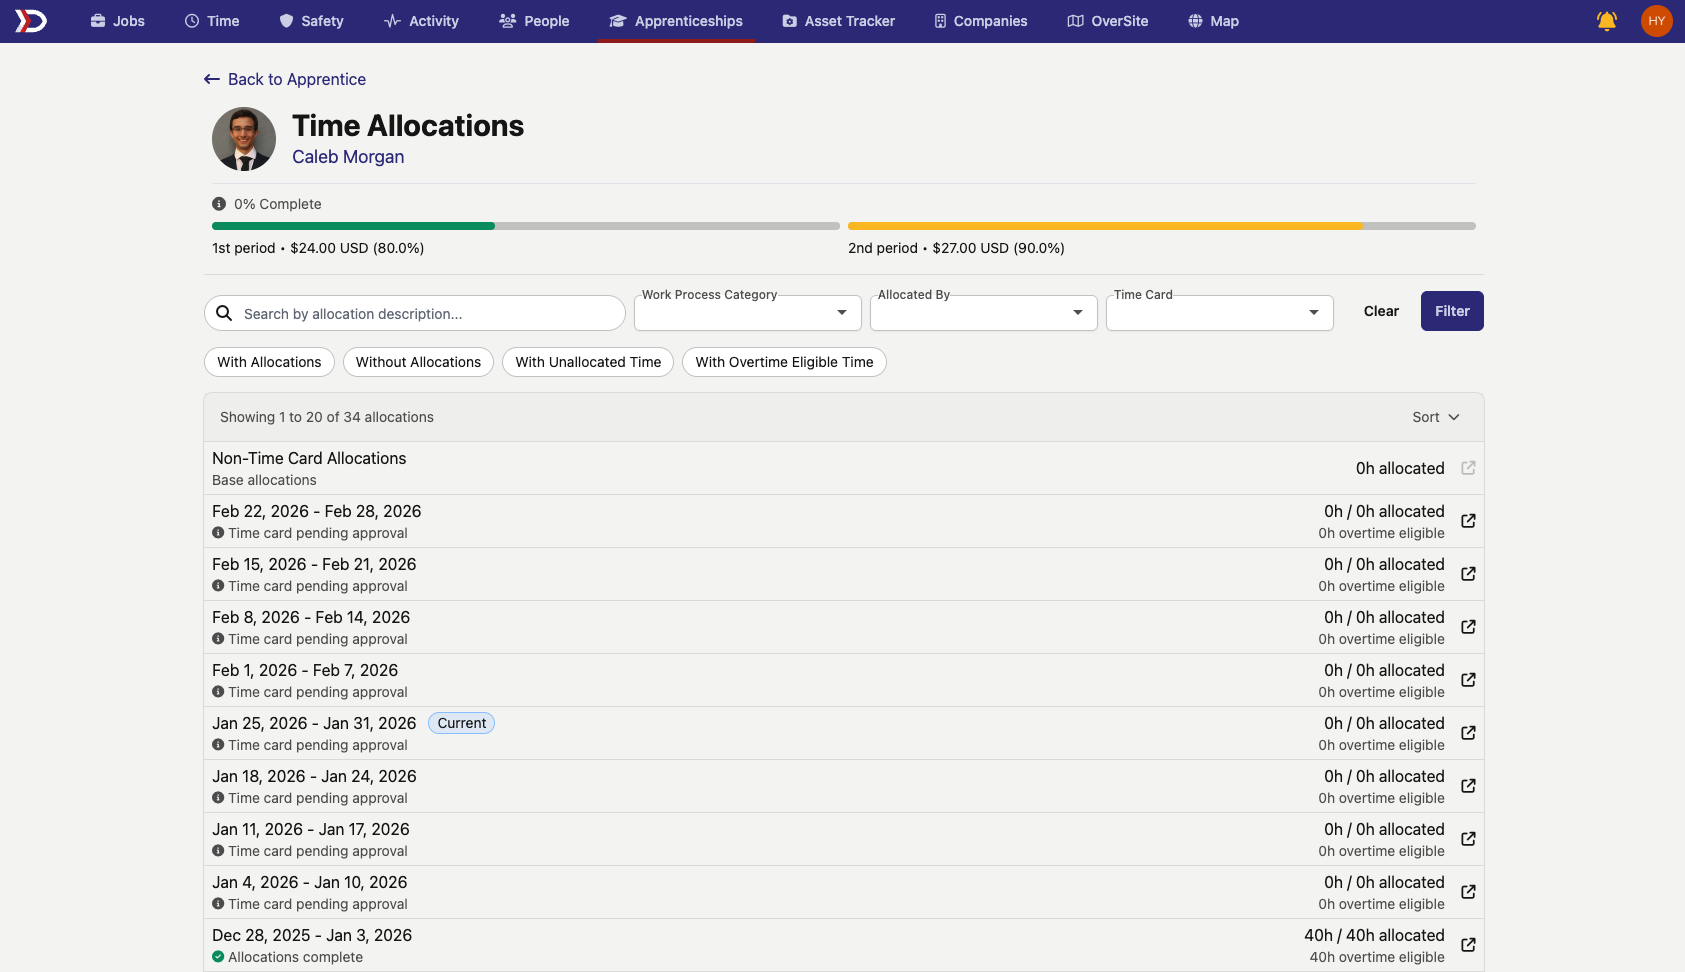
This will open the "Time Allocations" page for that work process category, where the amount of time allocated for each pay period is visible.
How Apprentices Can Allocate Hours Towards Their Program
For a detailed breakdown of how apprentices can allocate hours towards their Apprenticeship Program using DSPTCH mobile, please read our Apprenticeship Hours Allocation – Mobile Help Doc.
For a detailed breakdown of how Apprentices can allocate hours towards their Apprenticeship Program using DSPTCH web, please read our Apprenticeship Hours Allocation – Web Help Doc.